Showing posts with label recipe. Show all posts

2.05.2013

Seared Scallops on Potato Pancakes

Well, the advantage of neglecting writing the blog is the embarrassment of choices for my next post. One of my favourite recipes I made over the holidays was this seared scallop on potato pancake recipe. Sometimes I get inspired with what is on sale; in this instance, giant sea scallops. I googled a few recipes and found one served on a potato pancake. Not only is it a winning combination but it's also a very nice looking starter, sure to impress your guests! It requires 3 main steps but they're not too hard to make and well worth the effort.

Seared Scallops on Potato Pancakes

Seared Scallops on Potato Pancakes - Serves 4

Pesto sans cheese
I only made pesto without cheese because my mom doesn't eat dairy. One could argue that cheese is unnecessary when serving seafood. Feel free to add Parmesan to make pesto!

* 1 pack of basil
* a few toasted pine nuts
* 1-2 cloves of garlic, grated
* salt to taste
* olive oil

Place in a processor and pulse until smooth.
Set aside until ready to plate.

Potato Pancakes - makes 8-10 small panccakes
From Smitten Kitchen.
I benefited from Elle's experience making latkas. The trick she learned from Smitten Kitchen is to use a cheesecloth to get all the liquid out of the grated potatoes for the most crispy latka.

* 2 potatoes, grated
* ½ onion, sliced thinly
* salt to taste
* ½ egg, beaten
* 2 Tbsp flour
* olive oil

Mix the grated potato and onion slices.
Season to taste with salt.
Strain the potatoes of any liquid using a cheesecloth.
Mix in just enough egg so the mixture holds together.
Add the flour so the mixture is not too wet.
Heat oil in a pan on high heat.
Form small pancakes, a little bit bigger than the scallops, and fry on each side until golden and crispy.
Place on a baking sheet in the oven at low heat until the scallops are ready

Potato Pancakes
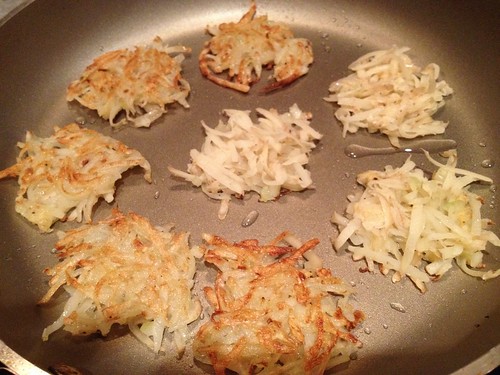
Frying potato pancakes.

Seared Scallops
There are three important steps to follow when searing scallops: 1) the scallops should be dry, 2) the pan must be very hot and 3) do not overcook the scallops. Otherwise, it's fail safe!

* 8 large scallops
* salt and pepper to taste
* olive oil

Pat dry the scallops with a paper towel.
Season each side with salt and pepper.
Heat oil in a pan on high heat.
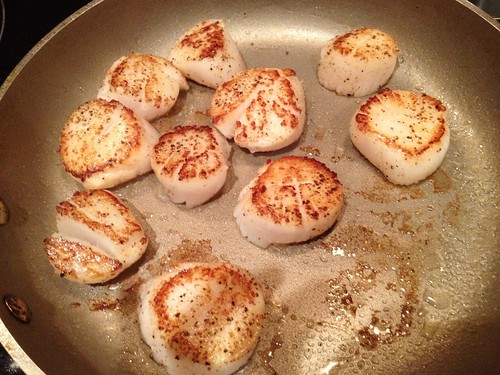
When hot, add scallops to the pan and cook for 3-4 minutes on each side depending on the size of the scallops - you want the scallops to be just passed the stage of being translucent (you can check the sides of the scallops for this).

Searing Scallops
Searing scallops.

To plate

Place two potato pancakes on each plate.
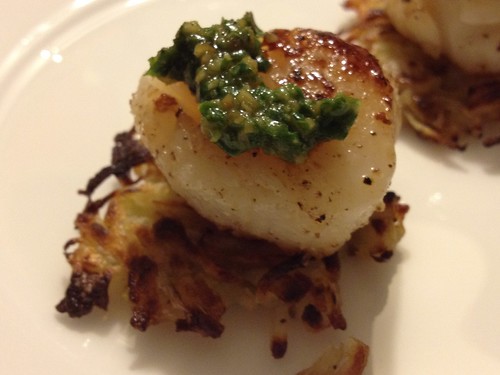
Top with scallops and a spoonful of pesto.
Tada!

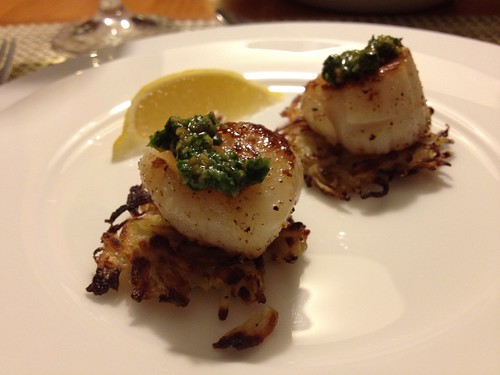
Seared Scallop on Potato Pancake

10.25.2012

Caramelized Onion and Pancetta Quiche

This recipe was such a winner that I actually made it twice in the span of a month. I love the savouriness of the pancetta and Gruyère cheese and the sweetness of the caramelized onions against the ultra flaky crust.

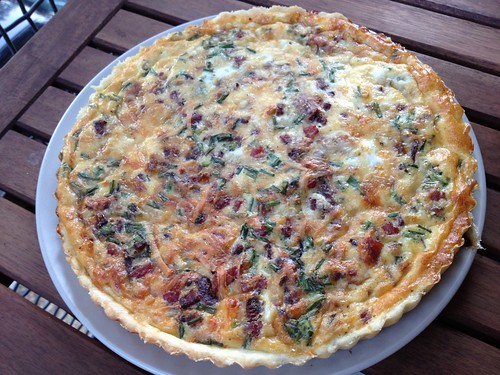
Quiche
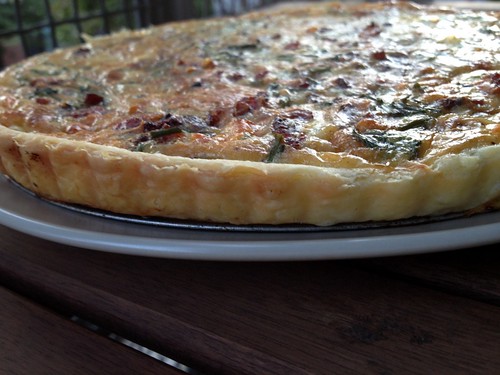
Caramelized Onion and Pancetta Quiche.

I also loved this quiche recipe because I actually learned how to master three recipes:
1) caramelized onions
2) flaky pâte brisée - perfect go to recipe for pie dough
3) quiche

I was able to master the three recipes because they were very easy to follow with some good, no fail tips that can be applied to other recipes.

Caramelized Onion and Pancetta Quiche
Originally seen on Cupcakes and Cashmere, recipes from Simply Recipes.

Caramelized Onions
The main tip for making good caramelized onions is patience, patience and more patience. I put the timer on to make sure I cooked the onions for 40 minutes and did not cheat! You should plan to make more than the recipe requires because it'll be hard to resist sampling some, or it'd be great to save for other recipes (like onion dip!).

* olive oil
* 2 red onions, sliced thinly
* salt
* 1 tsp balsamic vinegar

Heat olive oil in a pan on medium/high heat.
Add the onion slices and sprinkle a little bit of salt on top.
Cook, stirring occasionally for 10 minutes, until onions have softened and are translucent.
Reduce the heat to medium low and cook for an additional 40 minutes, stirring occasionally, until the onions are well browned.
Add balsamic vinegar and cook for 10 minutes more, until onions are completely caramelized.
Set aside.

Red onions Caramelized onions
Caramelized onions.

Pâte Brisée
The key tip for a flaky crust is to use frozen butter. Do not skip this step and you will have the best crust with minimal effort. From Simple Recipes - refer to the site for great step by step pictures.

* 1-¼ cups all-purpose flour, plus extra for rolling
* ½ tsp salt
* ½ tsp sugar (increase to 1-½ tsp if for a sweet recipe)
* 8 Tbsp (1 stick) unsalted butter, very-cold, cut into ½ inch cubes
* 3 to 4 Tbsp ice water, very cold

Cut up a stick of butter into small (about ½-inch) cubes, and put it into the freezer for at least 15 minutes, better an hour, best overnight.
Place the flour, salt, and sugar into a food processor and pulse until well combined.
Add half of the butter cubes and pulse 6 to 8 times.
Add the other half of the butter cubes and pulse 6 to 8 more times. You should have a mixture that resembles a coarse meal, with many butter pieces the size of peas.
Add a couple of tablespoons of ice cold water (without the ice!) to the food processor bowl and pulse a couple of times.
Then add more ice water, slowly, about a tablespoon at a time, pulsing after each addition, until the mixture just barely begins to clump together. (If you pinch some of the crumbly dough and it holds together, it's ready, if not, add a little more water and pulse again. Try to keep the water to a minimum. Too much water will make your crust tough.)
Remove the crumbly mixture from the food processor and place on a very clean, smooth surface.
Use your hands to press the crumbly dough together and shape into a disc.
Work the dough only enough to just bring the dough together. (Do not over-knead or your crust will end up tough.)
Sprinkle the disc with a little flour on all sides.
Wrap the disc in plastic wrap and refrigerate at least 1 hour. (At this point you can freeze the dough disk for several months until ready to use. Defrost overnight in the refrigerator before proceeding.)
When you are ready to roll out the dough, remove the disk from the refrigerator and place on a clean, smooth, lightly floured surface, letting it sit for 5 to 10 minutes.
Sprinkle some flour on top of the disk.
Using a rolling pin, roll out the dough to a 12 inch circle, to a thickness of about ⅛ of an inch thick.
Place on to a 9-inch pie plate, lining up the fold with the center of the pan. (I used a fluted tart pan with removable bottom.)
Gently unfold and press down to line the pie dish with the dough.

Quiche crust
Flaky crust.

Quiche
Although the recipe calls for pre-baking the crust, I skipped this this step both times with no issues. In terms of tips for quiche, if you follow the recipe for the egg mixture, you can add any filling that you come up with, although cheese is kind of required. Just mind the filling ingredients when seasoning the quiche. In this case, there is no need for additional salt, considering the salty pancetta and cheese as filling. Once the dough is rolled, it's just an assembly job.

* 1 recipe pie dough
* 6 ounces Gruyère cheese, grated (1-½ cups)
* caramelized onion
* 3 large eggs
* ½ cup milk
* ½ cup heavy cream
* pinch nutmeg* Pancetta, cubed and cooked
* chives

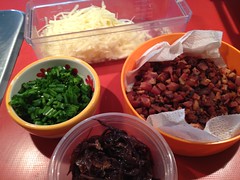
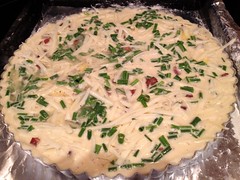
Ingredients for quiche Quiche into the oven
Quiche closeup
Quiche ingredients.

Preheat oven to 350F.
Place tart pan on a baking sheet to catch any run-off there might be. (This is worthwhile as there will be run-off.)
Sprinkle half the cheese evenly over the bottom of the crust.
Spread caramelized onions and pancetta over the cheese.
Top with remaining cheese and chives.
In a medium bowl, whisk together milk, cream, and eggs.
Season with nutmeg and pepper.
Pour egg mixture onto crust.
Bake until just set in the center, 30 to 35 minutes.
Cool on a wire rack for about 10-15 minutes before slicing.

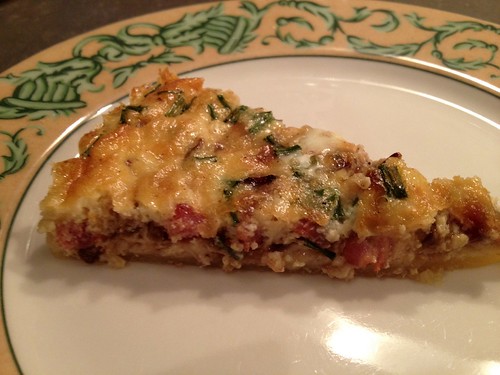
IMG_1501
Quiche slice.

This makes the perfect brunch dish, that can be served with a side salad. Everything can be prepared the night before, and just baked in the morning.
9.30.2012

Wild Blueberry Pancakes

One of the best thing about camping is making breakfast outdoors.  The first morning we were camping in Cape Cod, we kept it simple.  Coffee in a French press while I fried eggs and bacon.  Thick cut maple smoked bacon from the butcher counter at Whole Foods.  It was the best.

But on our bike ride we picked some wild blueberries and I knew that they would go in my favourite pancake recipe.  I received this recipe on a recipe swap and it is just the best recipe for no fail light and fluffy pancakes.

DSC_3483

(Em's) Great Uncle Nestor's Pancakes (Serves 4-6)

* 2 cups milk
* 2 cups flour
* 2 eggs
* 1 Tbsp  sugar
* 2 Tbsp baking powder

Whisk eggs and milk.
Mix dry ingredients.
Add dry ingredients to wet ingredients.
Do not overmix (should be slightly lumpy).
Add fruit as desired.

DSC_3479
Cooking up pancakes.

NOTE: For camping I had measured the dry ingredients into a container. At the site, I just had to whisk the egg and milk (preferably in a pourable container) and add the premixed pre-measured dry ingredients.

DSC_3487

8.20.2012

Chocolate Pavlova

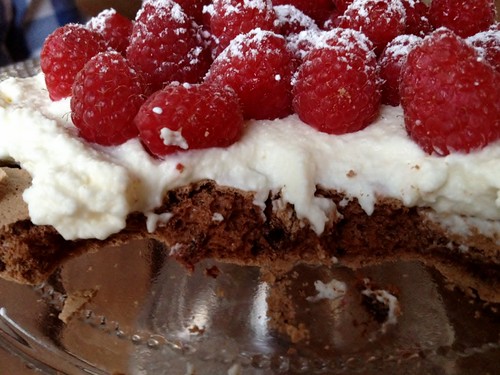
I had Elle and her husband D over for dinner at my condo. We had lobster ravioli's (homemade and frozen), and I had to think of an easy dessert. With pints of fresh raspberries in my fridge, I thought a pavlova was the perfect idea. Elle had mentioned having a chocolate pavlova, and  I thought I would try my hand at it since I have gainfully mastered pavlova's in the past.

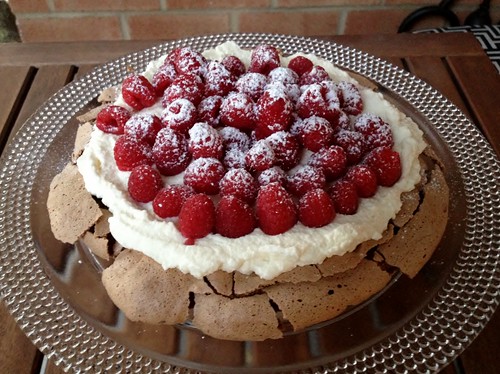
IMG_0542 (1024x765)
Chocolate Pavlova.

Chocolate Pavlova (Serves 3-4)
I halved this recipe and adjusted the baking time accordingly.
From Joy of Baking.
Pavlova
* 3 egg whites, room temperature
* ⅛ tsp cream of tartar
* ½ cup sugar
* ½ tsp white vinegar
* ½ tsp pure vanilla extract
* ½ tsp cornstarch
* 1-½ Tbsp Dutch processed cocoa powder
* 1 ounce semi-sweet or bittersweet chocolate, chopped

Preheat oven to 250 degrees F and place rack in center of oven. 
Line a baking sheet with parchment paper and draw a 6 inch circle on the parchment paper.
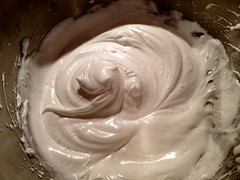
With electric egg beaters or by hand, beat the egg whites until foamy. (The trick here is that the eggs should be at room temperature. Warm the eggs up in a bowl of hot water if you're getting them straight from the fridge. Also, make sure absolutely no yolk has tainted the egg whites. Break the eggs one at a time, transferring successfully separated egg whites to a separate bowl.)
Add the cream of tartar and continue to beat on medium-high speed until they hold soft peaks.
Start adding the sugar, a tablespoon at a time, and continue to beat until the meringue holds stiff peaks. (Test to see if the sugar is fully dissolved by rubbing a little of the meringue between your thumb and index finger. The meringue should feel smooth, not gritty. If it feels gritty the sugar has not fully dissolved so keep beating until it feels smooth between your fingers).
Using a large rubber spatula, fold in the vinegar and vanilla extract.
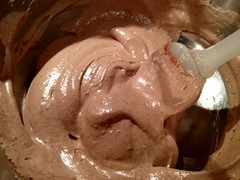
In a small strainer, sift the cocoa powder and cornstarch over the top of the meringue and, with the rubber spatula, fold in.
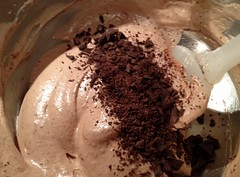
Lastly, fold in the chopped chocolate. (I chopped it fine but would leave bigger chunks next time to created gooey pieces of chocolate within the pavlova.)
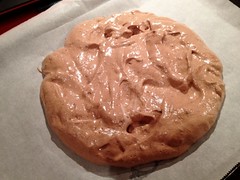
Spread the meringue inside the circle drawn on the parchment paper, smoothing the edges. (I find what works best to get a nice circle is to put a large spoonful in the middle and work your way out.)
Bake for about 1 hour or until the outside is dry. (The outside of the meringues will feel firm to the touch, if gently pressed. There will be cracks and you will see that the inside is soft and moist.)
Turn the oven off, leave the door slightly ajar, and let the meringue cool completely in the oven.
The cooled meringue can be made and stored in a cool dry place, in an airtight container, for a few days.
Just before serving gently place the meringue on a serving plate.

IMG_0530 (1024x768) IMG_0531 (1024x767)
IMG_0532 (1024x754) IMG_0533 (1024x768)
Making the pavlova.

Topping
* ½ cup heavy whipping cream
* 1 Tbsp granulated white sugar
* fresh fruit of your choice - raspberries are lovely with chocolate
* powdered sugar

Whip the cream until soft peaks form. (The trick here is that the cream should be cold and ideally, the bowl too. You can whip the cream over a second bowl of ice water to help.)
Sweeten with the sugar and spread the whipped cream over the meringue.
Arrange the fruit on top of the cream.
Serve immediately as this dessert does not hold and once you add the cream and fruit the meringue will start to break down.
Dust fruit with powdered sugar.

IMG_0546 (1024x767)

We grabbed 3 spoons and dug into the pavlova without cutting it. It was amazing. The pavlova was crunchy on the outside, but still chewy on the inside. With the whipped cream and the fresh raspberries, it was a heavenly combination! Great results for minimal effort!
2.29.2012

Squash Lasagna

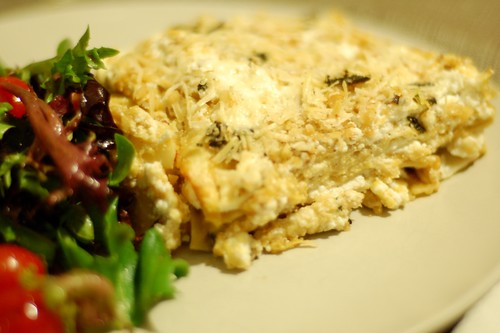
Elle and I check out the blog Lake Jane every day for design, fashion, and food posts. We ♥ it. Best of all, Marie-Ève is based in Montréal. While I was salivating over the pictures of "squash cream", Elle was making plans to actually make this recipe.

DSC_0678 (1024x681)

Squash Lasagna - Serves 4
From Lake Jane.

Homemade Pasta
From Joy of Cooking: All about Pasta & Noodles.
The quantities were reduced to about two servings of pasta, but this was still a bit too much pasta for the lasagna.

1-½ all purpose flour
2 eggs
¼ tsp salt (optional)
¼ tsp extra-virgin olive oil
water, as needed

Pour flour onto a clean counter (or a big bowl), shaping into a mound and make a well in the center.
Add to the well, the eggs, salt and olive oil.
Beat the eggs lightly with a fork, drawing in some flour as you go, until the eggs are mixed and slightly thickened.
Using the fingertips of one hand, gradually incorporate the flour into the eggs and blend everything into a smooth, not too stiff dough.
If the dough feels too dry and crumbly, add water as needed.
Knead the dough until satiny and very elastic, 5-10 minutes.
Divide the dough into 2 pieces and wrap the pieces loosely in plastic.
Shape one of the pieces into a flat rectangular piece.
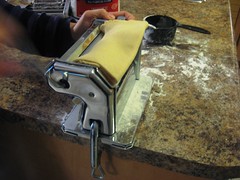
Adjusting to the widest opening, pass the dough through the rollers, turning the handle to roll it through.
Fold the sheet in two, sprinkle lightly with flour and pass the pasta through the same rollers a second time.
Repeat folding the pasta in two and rolling 3-4 times, sprinkling with flour if the pasta gets sticky.
Reduce the spacing between the rollers to the next level and pass the sheet of dough through the rollers.
Continue reducing the space between the rollers by one notch at a time; if the sheet of dough gets too long, cut the pasta sheet in half, to make it easier to roll.
Roll the pasta sheet until you reach the thinnest setting.
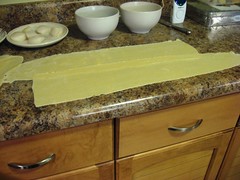
Cut the pasta sheet into pieces that will fit the baking dish you'll be using.
Cook enough pasta sheets in boiling, salted water to make 3 or 4 layers (don't lay them on top of each other or they will stick). If there is too much pasta, it can be frozen for future use.
Set aside for lasagna.

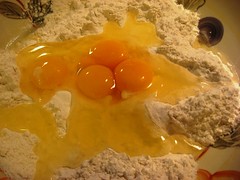
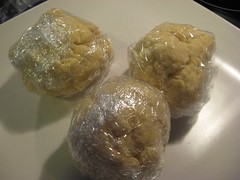
Flour & Eggs Balls of pasta dough
Rolling the pasta Thin sheets of pasta
These pics are from my fresh egg pasta post on my old blog!


Brown Butter and Crispy Sage
▪ 2 tbsp of butter
▪ 12 or so fresh sage leaves

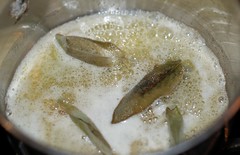
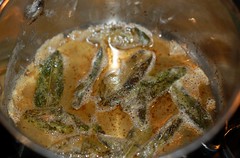
Melt the butter in a frying pan over medium-high heat.
As soon as it starts to turn a tan color, drop the sage leaves in and fry in the brown butter.
Remove the pan from the heat as soon as your butter is a beautiful nutty color and you smell the sage. Place the sage leaves on a paper towel and save the butter.

DSC_0645 (1024x660) DSC_0647 (1024x674)

Squash Cream
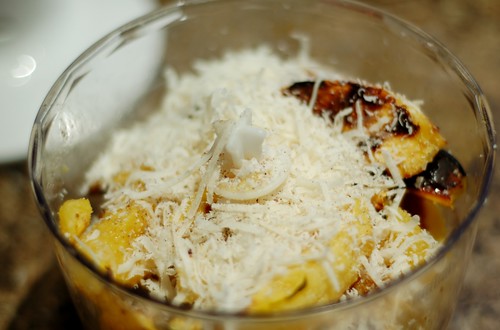
We couldn't find butternut squash so used an acorn squash with yummy results. After making the squash filling (or "squash cream" as Lake Jane refers to it), we had to sample it and were instantly addicted to the creaminess!

▪ 1-½ acorn squash (or butternut squash like the original recipe), roasted
▪ olive oil
▪ salt and pepper, to taste
▪ Grated fresh Parmesan
▪ Brown butter
▪ 2 Tbsp of milk (because we didn't have cream, but cream would make it better!)

Cut the acorn squash in two, and take out the seeds.
Slice the squash into crescent shape pieces and place them on a baking sheet.
Drizzle with olive oil.
Season with salt and pepper to taste.
Bake in the oven for 10-15 minutes until the squash slices are cooked through.
Once the pieces of squash are cool enough to handle, remove the skin, and place the roasted squash in a food processor.
Add the Parmesan, brown butter and milk in the food processor, and blend together.
Taste and adjust seasoning as required.

DSC_0658 (1024x675)
 Ingredients for the squash cream (oops forgot to take a pic of the actual squash cream!)

Walnut Crumble
▪ ¼ cup of roughly chopped walnuts▪ 1 clove of garlic
▪ salt

In a food processor, pulse the walnuts, coarse salt and garlic forming a crumble.
Set aside.

Ricotta Filling
▪ 1 cup of ricotta
▪ salt and pepper

Season the ricotta with salt and pepper to taste.

Putting the lasagna together
▪ Olive oil
▪ Cooked homemade pasta sheets (or store-bought lasagna sheets)
▪ Squash Cream
▪ Ricotta filling
▪ Walnut crumble
▪ Crispy sage leaves
▪ Parmesan, grated

Drizzle olive oil at the bottom of a baking dish.
Cover the bottom the dish with cooked pasta sheets.
Spread the squash cream over the pasta.
Spoon some ricotta filling on top.
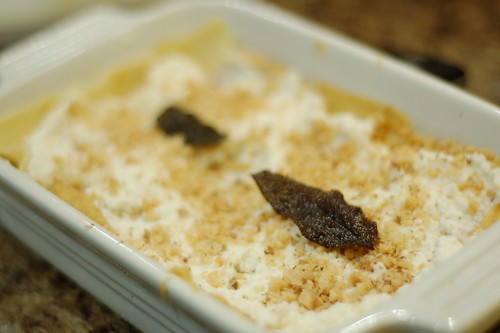
Sprinkle the walnut crumble and add a few sages leaves (you can crumble them to cover more surface).
Repeat the layers 3 or 4 times.
At the very top, add more grated Parmesan for good measure!

DSC_0671 (1024x681)

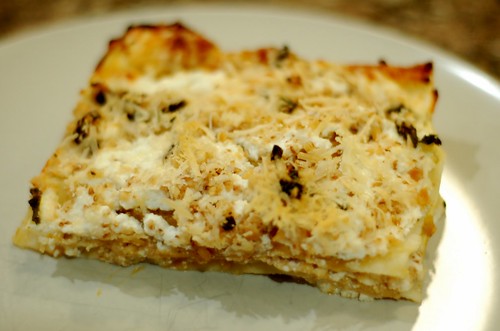
This was a winning recipe! Not only did it taste as good as it looked on Lake Jane's blog, but it's so original; it's nothing like any recipe I've had. I love that it uses squash in a non-traditional way. I will definitely be making this dish again and again! I think it would totally win over any guest.

DSC_0672 (1024x678) (1024x678)

2.26.2012

Taralli

Taralli never appealed to me until someone brought some to work. The Italian light and crispy breadsticks were studded with fennel seeds and had a great salty bite. I fell. Hard.

DSC_0660 (1024x680)

I loved the fennel seeds in the taralli I tried and I thought adding these with another classic, peperoncini, would make a great combination for my first batch of taralli. I also wanted to try a less common flavour, rosemary for the second batch.  
 
Taralli
Makes about 24 breadstick-shaped taralli's.
Adapted from Babbo Ristorante and David Rocco.

I immediately wanted to try the recipe from Canadian-Italian TV host David Rocco. But I then found a recipe  from Babbo Ristorante's website, my Italian Iron Chef hero's restaurant. This recipe has more wine, white wine in this case, but I did not go to the trouble of getting 00 flour, so I adapted from both recipes since David Rocco's recipe used all-purpose flour.

▪ 250 g (½ lb) all-purpose flour
▪ 2 tsp salt
▪ ½ tsp sugar
▪ 1-½ Tbsp fennel seeds / 2 tsp crushed red pepper flakes OR 2 Tbsp fresh rosemary (roughly chopped)
▪ ¼ to ½ cup (250 ml) white wine, or as much as you need
▪ ½ cup (250 ml) extra virgin olive oil

Place the flour, salt, sugar, and flavourings of your choice in the bowl of an electric mixer.
Add the wine and oil and mix on medium speed to form a wet dough.
Add more wine and/or water as required.
Transfer the dough to a plastic container, well dusted with flour.
Sprinkle the top of the dough with more flour, cover and refrigerate for at least 2 hours or overnight.

DSC_0629 (1024x668) DSC_0632 (1024x612)
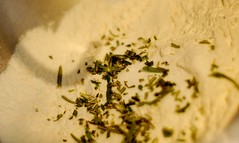
Dry ingredients for the different flavoured taralli.

Turn the dough out onto a floured board and knead lightly.
Divide the dough into two pieces.
Roll portions of the dough into long ropes, about ¾ inch in diameter.
Cut the rope into about 4" pieces. (Taralli are traditionally shaped into rings, but I chose to shape them like breadsticks. It's also less effort this way!)
Boil approximately 4-5 litress of water in a large, shallow pot.
Season the water with salt.
Drop the dough sections, about 6 at a time; the water should remain at a simmer.
The taralli will float to the top when they are done.
Gently scoop them out of the water with a slotted spoon or a Chinese skimmer, allowing them to drain for a moment in the spoon, before placing them on a cookie sheet lined with parchment paper.
The dough is still pliable so straighten them to make nice breadsticks-like taralli.
While you are boiling the taralli, preheat the oven to 375 F.
Bake the taralli for 40-50 minutes, flipping them over half way through.
Remove them from the oven when they are a nice even, golden brown.
Transfer to a rack to cool completely before storing them in an airtight container.

DSC_0637 (1024x680) DSC_0635 (1024x612)
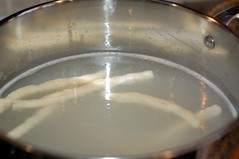
Boiling taralli and laid down on parchment paper for baking.

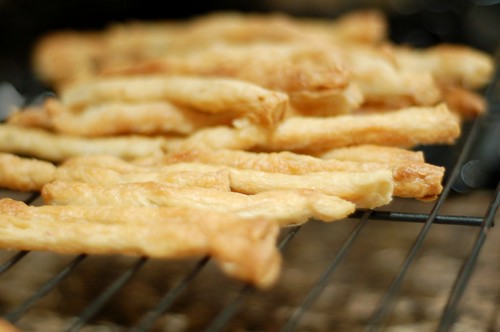
Making taralli is labour intensive but the crispy and delicious finished product was more than worthwhile! While I enjoyed both batches, my favourite is still the fennel seeds one. Unfortunately, I didn't put enough chili flakes to get enough kick. I would also add more rosemary next time for more punch. (The recipe above reflects the more generous quantities.) Other great ideas for flavourings would be to roll the boiled taralli with sesame seeds, or with very finely grated Parmesan. They make a perfect pairing with a glass of wine!

DSC_0664 (1024x659)